I am a huge fan of the ability to run Ubuntu on Windows as part of the Windows Subsystem for Linux. I was heavily involved in the business and technical discussions around bringing this solution to market. My team is now responsible for the ongoing development and improvement of the Windows Subsystem for Linux.
However, there is one thing that has always bugged me when I am using Ubuntu on Windows. And that is that the font is not quite right. You see, the Windows Command Prompt uses the Consolas font by default – however Canonical uses the Ubuntu Monospace font for their consoles.
Updated – 1/2/2018 – 9:55pm – Added color information!
Fortunately, this problem is relatively easy to fix.
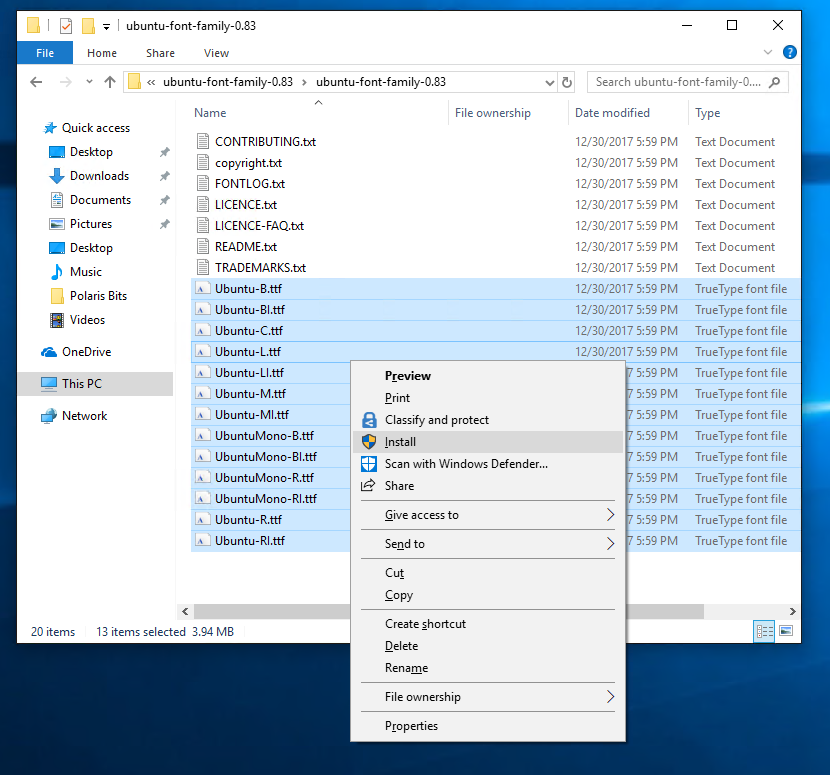
The first thing you need to do is to get a copy of the Ubuntu font. You can download this directly from https://design.ubuntu.com/font/ (scroll all the way to the bottom of the page and click on the “Download for free” button). This will download a .ZIP file that you can extract to a convenient location. When you look at the extracted files you will see a number of .TTF files. These are True Type Fonts. Each font can be installed on Windows by right clicking on it and selecting Install. You only need the “Mono” fonts, but I am lazy and just install them all:
Once you have installed the fonts, you can delete the .TTF files (as they have now been copied by Windows). Now we just have to get Ubuntu on Windows to use this font. There are two ways to do this, and you need to understand how Windows console fonts work to choose the right path for you. The key facts to be aware of here are:
- Windows does not allow you to change the console font dynamically based on the program you run. So you cannot have the console switch to the Ubuntu font automatically when you launch bash.
- Windows does allow you to associate different console fonts with different shortcuts.
- Windows also allows you to change the default font for all consoles.
With all this in mind, the two options you have are:
- Default all Windows consoles to use the Ubuntu Monospace font
- Have an Ubuntu shortcut that uses the Ubuntu Monospace font – while the rest of your consoles continue to use Consolas
I prefer the second option, but will show you how to do both.
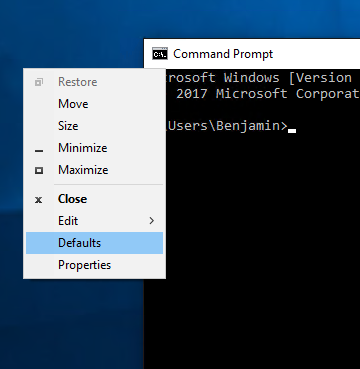
To change the default font for all consoles on the system you just need to open any command prompt (open the start menu, type in CMD and hit enter). Click on the top left of the Window title and select Defaults.
This will bring up the Console Windows Properties dialog. Here you can change to the Font tab. If you scroll to the bottom of the available fonts you will see Ubuntu Mono. You can then select this as your font to use.
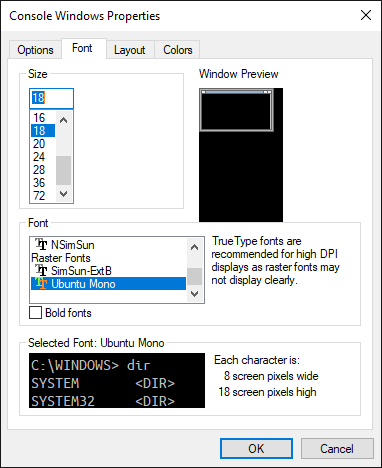
Note; the Ubuntu Mono font is slightly smaller than Consolas, so I changed the size from 16 to 18 to get the right feel on my computer. Finally press OK and now any console you open will use the Ubuntu font.
However, if you just want to change the font that it used by Ubuntu, launch Ubuntu from the start menu by selecting the Ubuntu icon (if you do not have this they you need to update to use the version of Ubuntu on Windows from the Windows Store). Click on the top left of the Window title, but select Properties this time (not Defaults). Then follow the steps above, finishing with pressing OK and closing the Ubuntu window.
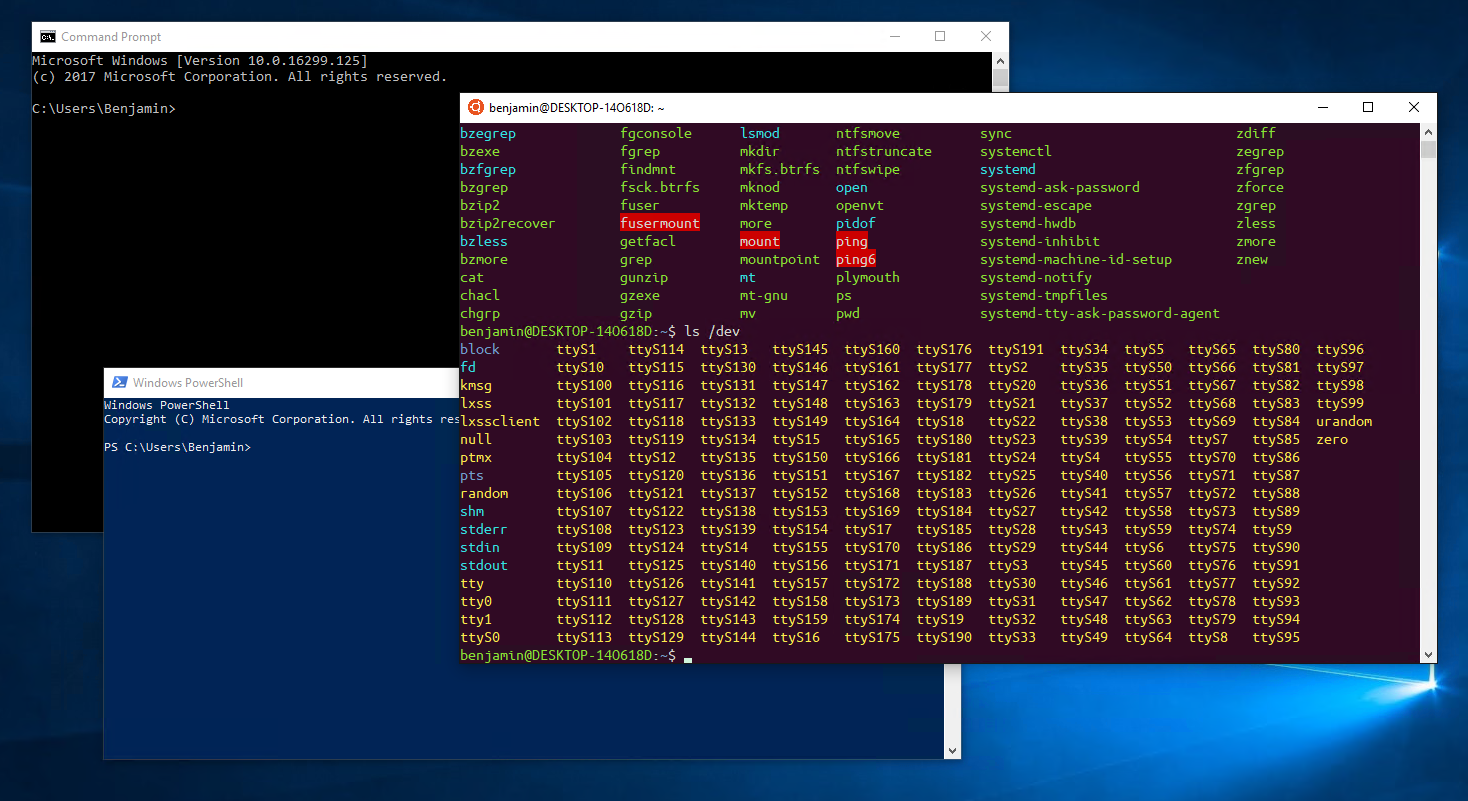
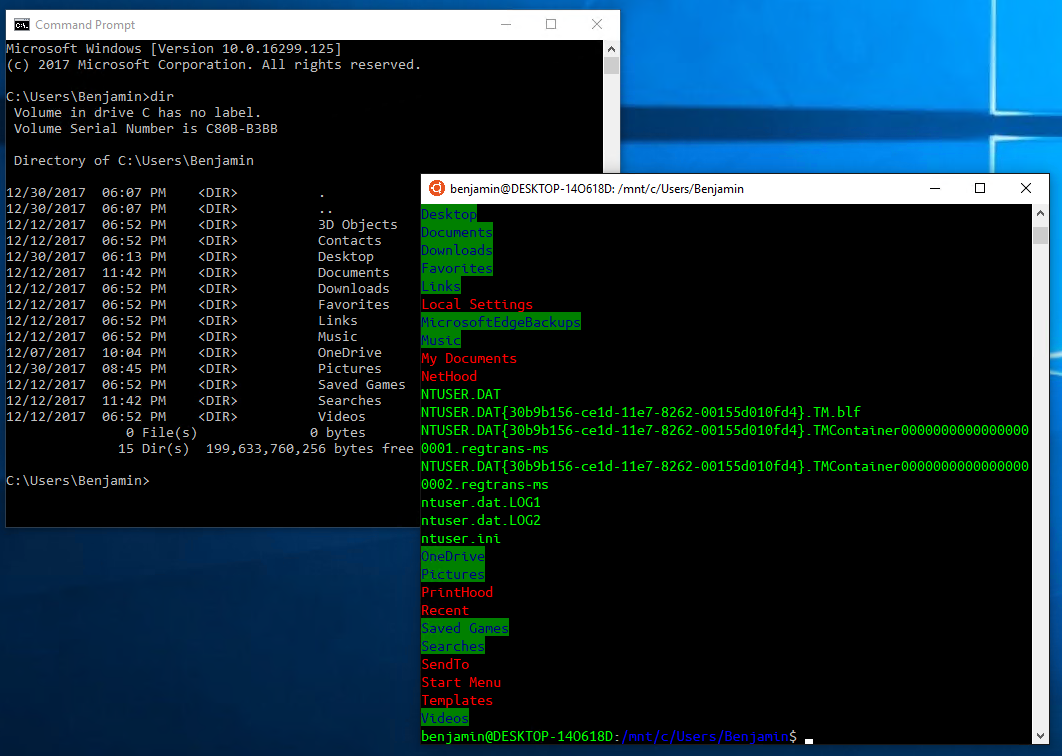
With this done you will now get the Ubuntu Mono font whenever you launch Ubuntu from the start menu, and Consolas for all your other Windows consoles. Like this:
It is not a big difference, but if you are using Ubuntu on Windows a lot, the little details matter! I hope this helps some people out.
Cheers,
Ben
Update – Fixing the color as well!
After publishing this article I was pointed to the following script on GitHub:
https://github.com/kuddman/ubuntu-bash-layout-for-windows/blob/master/change_font_colors.ps1
In order for this script to work, you need to first make a change to the Ubuntu console settings (this is needed so that Windows creates a unique registry key for the Ubuntu executable). Then run it from a PowerShell prompt (you can either download it or just copy and paste the contents). After doing this your Ubuntu on Windows console will have the correct color pallet as well! So Happy!